Monday, July 30, 2012
Monday, July 16, 2012
Sunday, July 15, 2012
Wednesday, May 9, 2012
InterceptorBinding in 4 Steps for CDI/JEE6 applications
Interceptors with interceptor binding in CDI/JEE6 enabled applications can be written & used by following the below simple steps.

- Create a custom annotation with @InterceptorBinding
@Inherited @InterceptorBinding @Retention (RetentionPolicy.RUNTIME) @Target ({ElementType.METHOD, ElementType.TYPE}) public @interface Logged { } - Create an interceptor class & annotate the class with the custom annotation.
@Logged @Interceptor public class LoggingInterceptor { - add a method to the interceptor. Annotate the method with @AroundInvoke annotation & pass InvocationContext object as a parameter.
@AroundInvoke public Object logMethodEntry(InvocationContext invocationContext) - Specify the interceptor in beans.xml file.

Now, the interceptor is ready to be used via the custom annotation. Use the custom annotation created earlier in the methods of the service classes those are exposed via CDI. (see below). This will make the CDI container to invoke the interceptor's intercepting method ( this is the method which is present in the Interceptor class & annotated with @AroundInvoke ) .
| @Logged |
| public String greet( final String greeter ){ |
| return "Hallo " + greeter + " from EJB"; |
| }
The complete code can be found here. Please see the video below, where I have demonstrated uses of Interceptors. |
Thursday, May 3, 2012
Asynchronous Methods in EJB
In this blog I will write about Asynchronous methods in EJBs. Will write an application where we will demonstrate how to access asynchronous methods in EJB.
Asynchronous methods are new in EJB 3.1. This can be achieved by an annotation named @Asynchronous. The annotation can be applied to class level & method level as well. See the code snippet below.
| @Stateless |
| @LocalBean |
| @Asynchronous |
| public class ServicesBean { |
| @Asynchronous |
| public void sendEmailAsync(final String recepient) { |
When we annotate a method in EJB with @Asynchronous annotation, the EJB container executes the method in an asynchronous manner. The caller of the async method doesn't have to wait until the completion of the async method execution.
| @Asynchronous |
| public void sendEmailAsync(final String recepient) { |
| //perform all activities related to |
| //the mailing actvity |
| LOG.info("strat of sendEmailAsync"); |
| /* |
| below code snippet is to show case |
| a long running process. Don't use |
| it in real time |
| */ |
| try { |
| Thread.sleep(4000l); |
| } catch (InterruptedException ex) { |
| LOG.log(Level.SEVERE, null, ex); |
| } |
| LOG.info("end of sendEmailAsync"); |
| }
If we observe the above code block, the complete execution of the block will take minimum of 4 seconds (For demonstration purpose I have used Thead.sleep(), please don't use such code blocks). In normal scenarios if we invoke this method in synchronous way, then the caller has to wait for minimum of 4 seconds.Which will impact heavily on the performance of whole application. Through the asynchronous capability of EJBs, we can avoid this problems. Handling Asynchronous method Responses:
If the async method returns some value or object, then the value/object needs to be sent
through java.util.concurrent.Future. Please see the code below.
public Future
return new AsyncResult
}
In the above method the return type is an Future object of type Integer.
The AsyncResult class is part of javax.ejb package & implement the Future interface.
To get the resulting info from the Future object, we can invoke the get() method of Future
object. Please see the code below.
Future
int res = result.get();
out.println("Async result is " + res);
In the below video, I have demonstrated developing & accessing asynchronous methods in EJB.
The complete working code can be found here. |
Wednesday, May 2, 2012
Programmatic login with Servlet 3.0
In this blog I will describe you how we can achieve programmatic login with Servlet 3.0 compliant JEE server or container.
The HttpServletRequest object in Servlet3 has got few new methods. Few of them are listed below.
The software used to illustrate the programmatic login are listed below.

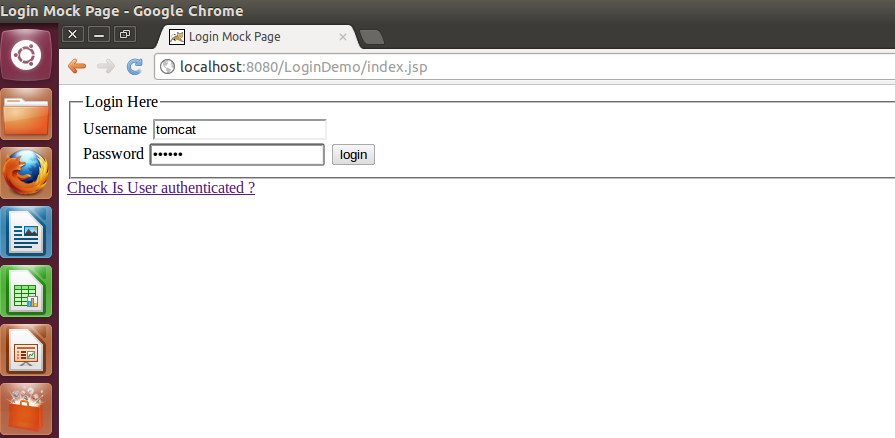
below. I have created two jsp pages index.jsp & myaccount.jsp. index.jsp has the login form where I will submit my action to a servlet, where I will perform my authentication.
To authenticate the user inputs I have created a servlet named AuthServlet in my application. The AuthServlet holds the business logic to perform login. Please see the code snippet below.
The request object has login() method. which takes 2 parameters. The first one is the username & second parameter as password. Then the login method validates the username/password with the default realm. In case of tomcat the default realm is configured with file based tomcat-users.xml file. which can be found under $CATALINA_HOME/conf directory.
So we have to configure few users in the tomcat-users.xml file. See below for a sample config.

Tomcat creates an authenticated subjected by matching the username/password provided with the username password available in tomcat-users.xml file (The file based realm is the default realm in tomcat, we can change it to LDAPRealm/JNDIRealm, JDBCRealm, JAASRealm) .
Similar to login() method, the request object has another method named logout(), which just logs out the user from current authenticated subject. See the code below for logout functionality.
The complete code can be checked in at Google svn & can be found here. The screen shots of the above application in running mode are given below.


Let me know if you find any difficulty in accessing or executing the code.
Thanks,
Abani R. Behera
The HttpServletRequest object in Servlet3 has got few new methods. Few of them are listed below.
- login(username, password) - validate the user with specified username & password with the default realm & creates an authenticated subject in the current request.
- logout() - logs out the current logged in user/subject
- getParts() - returns array of Multi-part objects available in the request.
- getPart(field) - return the multi-part object associated with the field name
The software used to illustrate the programmatic login are listed below.
- NetBeans 7.1.1 ( IDE )
- Tomcat 7.0.27 ( Server / Container )
- Ubuntu LTS 12.04 ( OS )

below. I have created two jsp pages index.jsp & myaccount.jsp. index.jsp has the login form where I will submit my action to a servlet, where I will perform my authentication.
To authenticate the user inputs I have created a servlet named AuthServlet in my application. The AuthServlet holds the business logic to perform login. Please see the code snippet below.
| private void processLogin(HttpServletRequest request, HttpServletResponse response) throws IOException, ServletException { |
| String username = request.getParameter("uid"); |
| String password = request.getParameter("pwd"); |
| RequestDispatcher rd = null; |
| try { |
| request.login(username, password); |
| rd = request.getRequestDispatcher("myaccount.jsp"); |
| } catch(Exception e){ |
| request.setAttribute("msg", "Unable to login with " + username + ""); |
| rd = request.getRequestDispatcher("login.jsp"); |
| } |
| rd.forward(request, response); |
| } |
The request object has login() method. which takes 2 parameters. The first one is the username & second parameter as password. Then the login method validates the username/password with the default realm. In case of tomcat the default realm is configured with file based tomcat-users.xml file. which can be found under $CATALINA_HOME/conf directory.
So we have to configure few users in the tomcat-users.xml file. See below for a sample config.

Tomcat creates an authenticated subjected by matching the username/password provided with the username password available in tomcat-users.xml file (The file based realm is the default realm in tomcat, we can change it to LDAPRealm/JNDIRealm, JDBCRealm, JAASRealm) .
Similar to login() method, the request object has another method named logout(), which just logs out the user from current authenticated subject. See the code below for logout functionality.
| protected void processRequest(HttpServletRequest request, HttpServletResponse response) |
| throws ServletException, IOException { |
| if ( request.getServletPath().equalsIgnoreCase("/login") ) { |
| processLogin(request, response); |
| } |
| else { |
| request.logout(); |
| request.setAttribute("msg", "You have successfully logged out of system"); |
| request.getRequestDispatcher("index.jsp").forward(request, response); |
| } |
| } |
The complete code can be checked in at Google svn & can be found here. The screen shots of the above application in running mode are given below.


Let me know if you find any difficulty in accessing or executing the code.
Thanks,
Abani R. Behera
Tuesday, May 1, 2012
Monday, February 20, 2012
Ajaxifying File Upload with HTML5/Servlet3.0
This post will describe about uploading a file in ajax without any third party java script libraries or tools which are used to upload files in asynchronous way.
To show case the demo, I have used FormData javascript library as my client side API & Servlet3.0 as my server side component, Eclipse Indigo as IDE and Tomcat 7 as the web container. I have followed bellow steps to do the sample app.
I have created a Dynamic Web Application with version 3 supported. So that, servlet 3 support will be added.
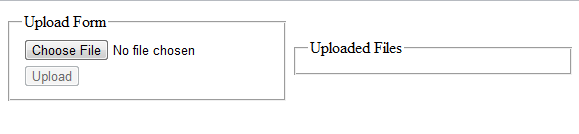
Created a jsp file named index.jsp which is main UI page. the code snippet for index.jsp is given below .

Have used simple input type file & a button to upload the selected file. On click of the upload button, I am calling a javascript function startUploading(this). The former method will create a javascript FormData object & send the object in the XHR-Ajax post method. the code snippet for the same function is given below.

We can notice few javascript built in functions.
First we have created a FormData Object with passing the html form object.
var vFD = new FormData(document.getElementById('upload_form'));
vFD will hold all the information about the HTML file component.
Again, we have created XMLHttpRequest (V2) Object with method type:POST, the invoking URL as upload & async as true. The URL is nothing but the server side component, to which we will post our FormData Object through ajax. For our case I have used an servlet (v3) as my server side component which will save the received file in the disk or file system.
Servlet 3 has built in support for handling multipart/form-data. Which means we don't have to depend upon third party libraries like apache commons file upload. Servlet 3 has introduced new interface named as Part which can be retrieved from the HttpServletRequest object. The Part object will hold the file information available in the request. We can retrieve the file content, file length, file type from the Part object. The Part interface has a write method which write the file to a location being passed as a method parameter. Please see the code below.
Part p = request.getPart("image_file");
This will create a object of Part from the request object.
p.write(disk_path);
This will write the file to the disk path specified in the method.
The code snippet for the above servlet (UploadServlet) is given below

Working demo of this application can be found out here.


To show case the demo, I have used FormData javascript library as my client side API & Servlet3.0 as my server side component, Eclipse Indigo as IDE and Tomcat 7 as the web container. I have followed bellow steps to do the sample app.
I have created a Dynamic Web Application with version 3 supported. So that, servlet 3 support will be added.
Created a jsp file named index.jsp which is main UI page. the code snippet for index.jsp is given below .

Have used simple input type file & a button to upload the selected file. On click of the upload button, I am calling a javascript function startUploading(this). The former method will create a javascript FormData object & send the object in the XHR-Ajax post method. the code snippet for the same function is given below.

We can notice few javascript built in functions.
First we have created a FormData Object with passing the html form object.
var vFD = new FormData(document.getElementById('upload_form'));
vFD will hold all the information about the HTML file component.
Again, we have created XMLHttpRequest (V2) Object with method type:POST, the invoking URL as upload & async as true. The URL is nothing but the server side component, to which we will post our FormData Object through ajax. For our case I have used an servlet (v3) as my server side component which will save the received file in the disk or file system.
Servlet 3 has built in support for handling multipart/form-data. Which means we don't have to depend upon third party libraries like apache commons file upload. Servlet 3 has introduced new interface named as Part which can be retrieved from the HttpServletRequest object. The Part object will hold the file information available in the request. We can retrieve the file content, file length, file type from the Part object. The Part interface has a write method which write the file to a location being passed as a method parameter. Please see the code below.
Part p = request.getPart("image_file");
This will create a object of Part from the request object.
p.write(disk_path);
This will write the file to the disk path specified in the method.
The code snippet for the above servlet (UploadServlet) is given below

Working demo of this application can be found out here.


Subscribe to:
Posts (Atom)